


The 2025 Voyagers Update is another big milestone. It introduces medium class custom ships, expands co-op options, and refines visuals across the board. If you’re thinking about jumping in for the first time, or it’s been years since you last played, now’s a smart time to start.

No Man's Sky
Release Date: August 12, 2016
Genres: Role-playing (RPG), Simulator, Adventure, Indie
TL;DR — No Man’s Sky starter checklist
- Start on Normal mode for the best balance.
- Prioritize Sodium (Hazard Protection) and Oxygen (Life Support).
- Fix your Scanner ASAP → scan everything for Units.
- Build a Portable Refiner early and always pick it back up.
- Stop at Space Stations for Exosuit slots + scanner upgrades.
- Get your Hyperdrive to leave the starter system.
Table of Contents
- No Man’s Sky Beginner Guide: Getting Started
- Game Modes and Survival Basics
- Repairing Your Scanner and Resource Loop
- Movement Tricks and Navigation
- Repairing Your Starship
- Building the Analysis Visor and Earning Currency
- Portable Refiner and Crafting Core
- Your First Flight and Flight Mechanics
- Base Building: First Shelter to Future Colony
- Exploring the Anomaly and Joining Expeditions
- Visiting Space Stations: Tech, Trade, and Upgrades
- Getting Your First Hyperdrive
- Building Your First Corvette (Voyagers Update)
- Where to Go From Here
No Man’s Sky Beginner Guide: Getting Started
Before you dive in, it helps to know what kind of game this is. No Man’s Sky is not about racing to the end. It’s not about collecting the best gear as fast as possible either. This is a game about moments, when you crest a ridge and find an alien landscape bathed in the light of a binary sun, when you meet a weird NPC and somehow understand what they want, or when your ship breaks down in the middle of nowhere and you just barely survive. That’s the core experience. Everything else builds from there.
Game Modes and Survival Basics
If you’re brand new, stick with “Normal” mode. It balances challenge and freedom without punishing mistakes. You can change difficulty later, so there’s no need to overthink it.
Your first few minutes are intense. You’ll wake up on a random planet with no working equipment. Hazard conditions might include toxic storms or freezing nights. The first goal: survive and reach your ship.
To stay alive:
- Recharge Hazard Protection with Sodium (yellow flowers or NA icons)
- Restore Life Support with Oxygen (red plants or O2 symbols)
- Use the quick menu (X on PC, D-pad down) to recharge instantly
You’ll probably panic a little the first time a storm hits. That’s normal. Find a cave, a rock overhang, or anything that gets you out of direct exposure. Even your ship’s cockpit works as temporary cover. If you’re lucky, the planet will have mild weather and plenty of resources. If not, the urgency will force you to learn fast.
The game doesn’t handhold too much, but it also won’t let you completely fail. If things go really bad, you can always respawn at your last save. Later, you’ll unlock creative and relaxed modes that offer different ways to experience the galaxy.
Repairing Your Scanner and Resource Loop
Your scanner is broken at the start. You’ll need Ferrite Dust to fix it. Shoot small rocks nearby with your mining laser.
Once fixed, the scanner highlights nearby resources. Use it often, but don’t spam it since there’s a cooldown. Always scan plants and rocks before mining them. It increases your yield.
The scanner is your best friend. Not only does it find important materials, but scanning also gives you Units. Every new plant, mineral, or creature is worth money. That makes your early gameplay loop simple and effective: explore, scan, mine, repeat.
As you explore more planets, you’ll notice patterns. Rich planets have dense flora and fauna. Harsh ones may be poor in resources but good for rare materials. Keep an eye on weather reports and planetary conditions before you land.
To recharge Hazard Protection and Life Support:
- Look for Sodium and Oxygen
- Keep using your scanner to find resource nodes
- Ping surroundings with C on PC or D-pad up on controllers
Movement Tricks and Navigation
Moving efficiently can save your life. Combine sprinting, melee, and jetpack to boost forward fast:
- Hold sprint (Shift), tap melee (Q), then jump (Spacebar)
Done correctly, this launches you forward. Use your jetpack to break your fall. Watch fuel levels so you don’t take damage on landing.
With practice, you’ll cover terrain fast without using too much jetpack fuel. This trick is especially useful on planets with aggressive weather or hostile fauna. Later upgrades will improve movement speed and reduce fuel usage, but early on, this technique can save time and health.
If you prefer a slower, more methodical approach, walk and scan everything. You’ll find strange items and occasional surprises. Movement isn’t just about speed, it’s about what you might miss if you rush.
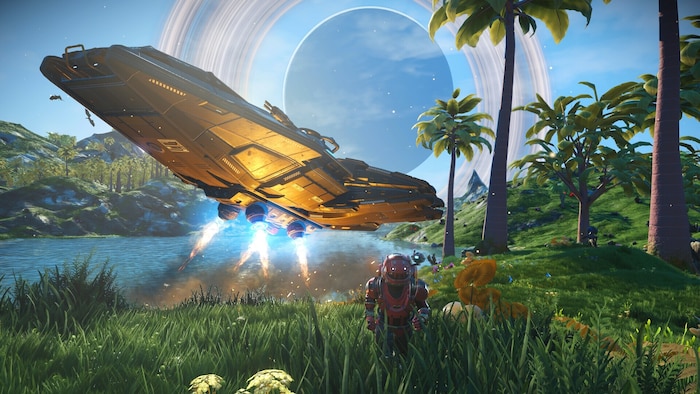
Repairing Your Starship
After learning to survive, you’ll find your ship, damaged and grounded.
To repair it, you need:
- Metal Plating (crafted from Ferrite Dust)
- Hermetic Seal (given via mission)
During storms, hide in caves, your ship, or dig into the ground using the Terrain Manipulator.
Pro tip: Don’t delete Rusted Metal or Living Slime. You can refine them into Ferrite Dust or Nanites later.
Repairing the Pulse Engine and Launch Thruster teaches core crafting mechanics. Pay attention to blueprints and what resources are required. This is the foundation of nearly everything in the game. Once you’re airborne, the whole system opens up.
When the ship finally lifts off, it’s a moment worth remembering. The scale of the planet, the jump into orbit, the sudden view of nearby moons, it’s all designed to feel like a breakthrough.
Building the Analysis Visor and Earning Currency
To install the visor, craft Carbon Nanotubes from Carbon (from plants). The visor opens up the game:
- Scan flora, fauna, and minerals for Units (the main currency)
- Discover Buried Technology Modules for Salvaged Data
- Find hidden loot caches and artifact sites
Units come from scanning. Nanites upgrade your tools. Salvaged Data unlocks blueprints. Each has its use.
Early money tips:
- Scan every creature you see
- Upload discoveries in the menu for extra Nanites
- Focus on planets with dense flora and fauna
The visor is not optional. It’s your main tool for progress. Later upgrades make scanning even more profitable.
Don’t forget to upload your discoveries. You’re rewarded with Nanites, and your finds are added to a universal catalog. It’s a small thing, but it adds to the sense that you’re part of something bigger.
Portable Refiner and Crafting Core
The Portable Refiner is essential. Craft one using:
- Metal Plating and Oxygen
Place it, fuel it with Carbon, and use it to refine:
- Ferrite Dust into Pure Ferrite
- Slime into Nanites
- Copper into Chromatic Metal
Always pick up your refiner after use to avoid leaving it behind.
Refining turns raw materials into upgraded forms used in construction, upgrades, and tech installations. Learn common recipes early, and you’ll spend less time hunting for rare items.
Bonus tip: Drop your refiner while mining to refine on the fly. That way, you double your efficiency.
You’ll eventually unlock larger refiners that can process more complex materials. But this small tool is your first step into deeper systems, and it stays relevant for much longer than you’d expect.
Crafting the Portable Refiner and Refining Essentials
One of the first key tools you’ll need is the Portable Refiner. It plays a central role in crafting throughout the entire game.
To build one, gather Metal Plating and Oxygen. Once it’s down, you can refine basic resources into more useful materials:
- Ferrite Dust becomes Pure Ferrite
- Copper becomes Chromatic Metal
- Slime turns into Nanites
- Silica Powder turns into Glass
You can let it run while you explore nearby. Just remember to pick it up when you’re done.
Your First Flight and Flight Mechanics
After you fix your ship and fuel the Launch Thrusters, it’s time to fly.
- To take off, press R2 or RT on console, or ZR on Switch
- Movement in space is faster and looser than in atmosphere
- Scan from the cockpit using C on PC or clicking both sticks on a controller
- Use Shift or Circle/B to boost
- Use the Pulse Engine to travel between points quickly: hold Spacebar or L1 and R1
- Out of fuel? Shoot asteroids. You’ll get Tritium for travel and often find metals like Gold or Platinum
- Your ship’s weapons are great for fast gathering on planets
Base Building: First Shelter to Future Colony
The game will walk you through building your first base with a Base Computer.
- Start simple: a basic wooden hut with a roof will do
- Use the Base Computer to name your base and take a snapshot
- Build a Construction Research Unit to find Buried Technology Modules. These unlock better buildings and items
- Get a Teleporter, solar panels, and batteries early on. That gives you fast travel and constant power
- If a planet stands out, drop a teleporter there. You can return to that base from anywhere
Exploring the Anomaly and Joining Expeditions
Eventually, the Anomaly will contact you. It’s a shared multiplayer space and a place to get upgrades.
- Inside, meet other players and check out their ships and bases
- You’ll find upgrades and tech that you won’t see at regular stations
- Iteration Ares rewards milestones. Iteration Helios rewards discoveries like scanned wildlife, plants, and terrain
When an Expedition is running, you can join from the Anomaly. These are seasonal events with shared goals and exclusive rewards. Once you’re familiar with the basics, they’re a good way to try new content and progress fast.
Visiting Space Stations: Tech, Trade, and Upgrades
Every system has a station, and they’re always worth stopping by. This is where you manage gear, expand inventory, and start making serious progress.
- Hit the Exosuit terminal next to the appearance station to add more storage slots
- Spend Units on cargo and tech upgrades for your suit
- Skip Multi-Tool slot upgrades early on, since you’ll find better tools anyway
- Look for S or A-class scanner upgrades first, they boost your income from scans
- Talk to aliens and use Knowledge Stones to learn the local language, which helps with trades and missions
- Give artifacts to NPCs to boost your faction rep and get access to better deals
Boosted slots show up in yellow and give a bonus when filled. Drop your best upgrades there for extra value.
Getting Your First Hyperdrive
To leave your starting system, you’ll need a Hyperdrive. The game walks you through it, but here’s the quick rundown.
- Buy Microprocessors from the space station vendor
- Craft Antimatter and Antimatter Housing to make a Warp Cell
- Install the Hyperdrive, then fuel it with that Warp Cell
- Open the Galactic Map (M on PC) to choose where to jump next
By default, the game shows the path to the galactic core, but you can head anywhere once you’re ready. And while you’re traveling, watch for distress signals. Crashed ships might look rough, but they’re still worth salvaging or scrapping for parts.
Building Your First Corvette (Voyagers Update)
The Voyagers update added player-built Corvettes, bigger ships made from separate parts.
- Use the teleporter pad in the hangar to reach the Corvette terminal
- Build sections like the engine, cockpit, and landing gear
- Find parts on planets or trade with other players to complete the ship
Just a heads-up, Corvettes are late-game content. You’ll need solid resources and patience to get there, so don’t rush it.
Extra Pointers and Next Steps
Some late-game systems and hidden mechanics are easy to miss. Keep an eye out for these.
- Knowledge Stones help you understand alien speech, which makes trading smoother
- Drop pods expand Exosuit storage, though you’ll need to repair them first
- Dissonant worlds may have Sentinel ships. Break them down for parts that lead to even more valuable wrecks
- Only invest in S or A-class gear. Anything below is usually not worth keeping
- Extra ships? Scrap them at a station for Units and upgrade items
Where to Go From Here
You’ve got the basics. The rest is up to you.
- Try different playstyles, base building, trading, exploration, or combat
- Team up in multiplayer if you want, it works across platforms
- Hit a roadblock? The community forums are packed with advice
- Look into farming Units, ship hunting, or advanced construction if you want to go deeper
There’s no single right path in No Man’s Sky. Whether you follow the story or make your own goals, there’s always more to find. Just keep exploring.